WooCommerce: Maxlength and Minlength for Checkout Fields

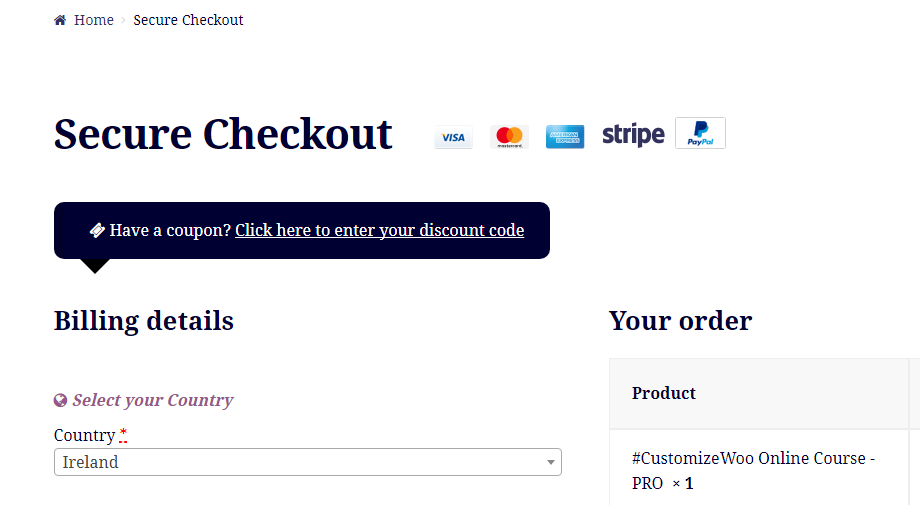
If you’re familiar with HTML, you can add “maxlength” and “minlength” attributes to an input field in order to force its value to be min X and max Y characters long. This is all good and easy, so we might as well see what happens on the WooCommerce Checkout page once we apply such attributes to a given custom field.

Spoiler alert: maxlength works, while minlength does not. Hence, forcing a given checkout field to have a minimum length is actually quite impossible, unless we validate the posted data (a field input value that is not long enough) once the checkout is submitted. That’s a bummer, and in this article I will also explain how to contact WooCommerce so they can improve a functionality / fix a bug.

Enjoy!

Continue reading WooCommerce: Maxlength and Minlength for Checkout Fields

WooCommerce: Attach Files (PDF, etc.) To Emails

Sure, you can add content to a given WooCommerce transactional email such as the Customer Processing Order email. You can even edit the email subject, for example by adding the first name. No matter what you need, there are many cool snippets to customize the default WooCommerce emails.

But what we haven’t seen yet is how to “attach a file” to a WooCommerce Order email. It seems like a very much needed admin option, but there is nothing to achieve that in the WooCommerce dashboard. And maybe that is because it’s super easy to do that with a few lines of PHP or a super simple plugin. Enjoy!

Continue reading WooCommerce: Attach Files (PDF, etc.) To Emails

WooCommerce: How to Alter Cart Items Count

We’ve already seen how to exclude hidden products from the WooCommerce Mini-Cart widget counter; today I want to expand on the same concept and try to recalculate / alter such counter based on custom criteria.

For example, some business models require to count the number of distinct items in the Cart, no matter their respective cart quantities. So, if there are 2x “Item 1” and 4x “Item 2”, this altered counter would show 1+1=2 and not 2+4=6. So, let’s see how this is done – enjoy!

Continue reading WooCommerce: How to Alter Cart Items Count

WooCommerce: How to Create Custom Logs

Logs or log files are a must for WooCommerce developers and store managers. Log files are basically an automatically generated collection of events that happen on a given store, based on certain logging criteria. For example, WooCommerce already creates a “fatal error” log for you, that you can easily access and read within the WordPress dashboard (WooCommerce > Status > Logs).

If you’re familiar with WordPress troubleshooting, you will know how important the debug.log file is while trying to identify website weaknesses, PHP errors or white screen of death. Well, today I’m going to teach you how to create your own log, so that you can record whatever event happens on your WooCommerce website and easily check the logs for troubleshooting purposes.

Specifically, I’ll show you how to create a log every time there is a customer failed order and every time there is a product price change made by the admin. Easy peasy – enjoy!

Continue reading WooCommerce: How to Create Custom Logs

WooCommerce: Display Product Up-sells @ Thank You Page

One of the most important WooCommerce pages, conversion-wise, is the Thank You page. That’s your chance to offer something special to a user that has just turned into a customer and is therefore more likely to purchase again.

We’ve seen how to include a whole WordPress page inside the Thank You page, how to redirect customers to a different Thank You page URL, how to display a custom social media share box on the Thank You page, but in this article I want to expand a little more on the topic and show a list of purchasable products via a shortcode.

The thing is that the Thank You page “does not exist” inside the WordPress pages, so you can’t just add a shortcode in a page. We must do that via a PHP action hook and the do_shortcode() WordPress function. Enjoy!

Continue reading WooCommerce: Display Product Up-sells @ Thank You Page

WooCommerce: How to Customize Checkout For Conversions

I had the honor to speak at WCEU 2020 thanks to WooCommerce, who hosted me in their Sponsor track. It was a short and sweet lightning talk on the first day (Friday), called “Customizing The WooCommerce Checkout To Improve Conversions“, followed by a live coding session on Saturday.

Here’s the video recording of the lightning talk, as well as a few PHP and CSS snippets you can copy/paste to improve your WooCommerce Checkout and immediately expect an increase in conversion rate. So, enjoy the video and then go test the snippets you find below!

Continue reading WooCommerce: How to Customize Checkout For Conversions

WooCommerce: Show SKU @ Cart, Checkout, Order & Emails

When SKU matters to the end user, displaying it in the Cart page, Checkout page, Thank you page, My Account View Order page and Order Emails under the item name is a must.

Ideal for B2B businesses and international brands, this simple customization can help you learn how to add any sort of content under the Cart/Checkout/Order item names. Simply use the same hook and try “getting” something different than SKU with this guide. Enjoy!

Continue reading WooCommerce: Show SKU @ Cart, Checkout, Order & Emails

WooCommerce: Calculate Subtotal On Quantity Increment @ Single Product

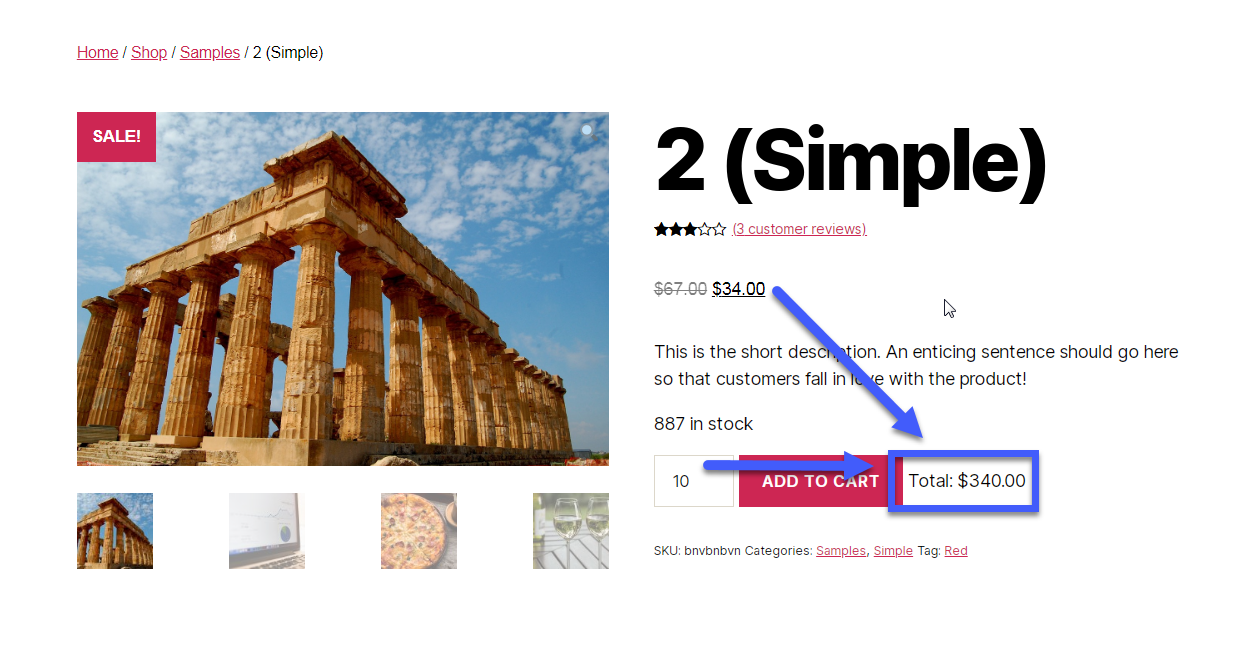
From a UX point of view, ecommerce customers may enjoy a little improvement on the WooCommerce single product page. As soon as they increase the add to cart quantity, it’d be nice if product price could be recalculated or maybe if a “TOTAL” line could appear so that users always know how much they are about to add to cart.

Honestly, this is hard to explain it this way, so the best is if you look at the screenshot. Enjoy!

Continue reading WooCommerce: Calculate Subtotal On Quantity Increment @ Single Product

WooCommerce: Set / Override Product Price Programmatically

There are times when the edit product page settings are not enough. Yes, you usually set regular and sale price via the price fields under “Product Data”; however sometimes you may have to override those prices via code, because you’re running a special promotion, you don’t want to manually change thousands of prices or maybe you need to show different values to logged in customers only.

Either way, “setting” the product price programmatically consists of two distinct operations. First, you need to change the “display” of the product price on single and loop pages; second, you actually need to set a “cart item” price, because the previous code does not really alter price values.

As usual, easier coded than said, so let’s see how it’s done. Enjoy!

Continue reading WooCommerce: Set / Override Product Price Programmatically

WooCommerce: Switch Image Background On Color Variation Selection

You could upload 10 images, one for each color of your variable product… or you could be slightly smarter and use 1 image only, and then when the user selects a color trigger a background color change!

Easier to code than to explain, so let’s take a look at the screenshot below (image must be a PNG with transparent background) and the PHP snippet. This could be a time-saver, enjoy!

Continue reading WooCommerce: Switch Image Background On Color Variation Selection

WooCommerce: Hide Category Images @ Shop

If your Appearance > Customize > WooCommerce > Product Catalog > Shop page display is set to “Show categories and products“, parent product categories will show in the “products loop” as the very first elements (see screenshot below). They really take up a lot of space and this could be annoying at times, mostly when you don’t use product category images.

Thankfully, if this makes sense to you and your customers, you can remove them easily (it’s one line of code). Also, this works really well when the number of parent product categories is proportional to the number of shop display columns (e.g. you have 6 parent categories and you have 3 products per row under Appearance > Customize > WooCommerce > Product Catalog > Shop page > “Products per row”). Enjoy!

Continue reading WooCommerce: Hide Category Images @ Shop

WooCommerce: View Product/Order Hidden Custom Fields (“Protected Meta”)

I was working on a WooCommerce project recently and I didn’t want to waste time searching through all the hidden product post meta.

Post meta are basically product custom fields that are added via the update_post_meta() WordPress function by WooCommerce itself, a custom plugin, a snippet, a theme. For example, “total_sales” is a default WooCommerce product custom field that updates every time the product is purchased. You can “get” total sales with the get_post_meta() WordPress function.

In the same way, there are dozens of default and third party product custom fields that are stored inside the WooCommerce product meta. If the product custom field “meta key” starts with an underscore (“_”), however, this won’t be visible in the “Custom Fields” section of the edit product page screen. Which is a bummer.

So, today, I’ll show you a quick trick so you can always know what the values for product meta keys are without having to mess with print_r() or error_log() in your PHP functions. In the image below, you see the final outcome.

Please note this also shows order hidden meta.

Enjoy!

Continue reading WooCommerce: View Product/Order Hidden Custom Fields (“Protected Meta”)

WooCommerce: Product Category Filter @ Shop Page

There is already a widget that allows you to place a “Product Category Dropdown” in your sidebar areas. The problem is that lately, sidebars have become kinda 1990. So, what if you want to place a “Category Select Box” anywhere in your WooCommerce website, and (in this case study), exactly on the Product Category pages, so that you can switch from one category to the other?

Well, in this snippet you will learn a lot of things. For example, the wc_product_dropdown_categories() function magically displays a category dropdown, while the wc_enqueue_js() function allows you to inject jQuery (responsible to trigger the category page redirect).

Continue reading WooCommerce: Product Category Filter @ Shop Page

WooCommerce: Sync Product Quantities @ Cart

This snippet will help you synchronize all your cart items’ quantities with a given product ID quantity. When you add a second product to cart, therefore, it will get the same quantity of your product ID. Also, if you update the quantity of product ID, the other cart item quantities will automatically update accordingly.

Applications are quite niche, but it’s great to learn how to programmatically set the quantity of a cart item. As usual, each snippet of this website has got something that sooner or later you may need to use. Enjoy!

Continue reading WooCommerce: Sync Product Quantities @ Cart

WooCommerce: Show Dispatch / Est. Shipping Date @ Single Product

A good way to inform online customers and avoid issues is showing the estimated delivery / dispatch time on the single product page, just below the “Add to Cart” button. Yes, you could do that manually by adding shipping info to each product short description, but the goal of Business Bloomer is to learn how to code that instead, so you won’t need to write things manually.

Also, this is great because if you change something in your dispatch rules, you just need to change the short PHP snippet and not all your product descriptions. It’s much more flexible this way.

Finally, in this post we’ll learn how to work with cut-off times (hour of the day) and current day of the week (pure PHP), so that we can show a “dynamic” notice based on current date. So, let’s see how it’s done!

Continue reading WooCommerce: Show Dispatch / Est. Shipping Date @ Single Product

WooCommerce: Rename a Breadcrumb Item

WooCommerce generates shop, category, tag, single product breadcrumbs out of the box. Such breadcrumbs should follow your WooCommerce permalink settings. For example, I use the “Shop base with category” option under WordPress > Permalinks. In my case, by default, a product belonging to category “Uncategorized” has an URL = “https://example.com/shop/uncategorized/product-name/” and its single product page breadcrumbs follow that same rule: “Home / Shop / Uncategorized / Product Name”.

Now, what if I want to rename one of the items? What if I want to replace one of the breadcrumb items with something else? Well, WooCommerce gives us a cool filter called “woocommerce_get_breadcrumb” that we can use to edit the breadcrumb content before displaying it. In this post, we will see how to add a suffix to product categories and also how to replace the product name with the SKU value. Enjoy!

Continue reading WooCommerce: Rename a Breadcrumb Item

WooCommerce: One Product Per Row @ Shop Page

By default, WooCommerce displays 4 products per row in the shop page. This is ok for almost any ecommerce website, however in certain cases you might want to change this setting in order to show full-width products (a.k.a. one product per row).

In this post we’ll look at the alternatives you have in regard to changing this setting, and also some CSS adjustments to make the 1-product-per-row shop page look better. Enjoy!

Continue reading WooCommerce: One Product Per Row @ Shop Page

WooCommerce: Display Product Reviews @ Custom Page (Shortcode)

WooCommerce product reviews shows by default in the “Reviews” tab in the single product page. But what if, like me, you’re using custom sales pages and need to show such reviews elsewhere – by using a shortcode?

I’ve spent some time doing this for two Business Bloomer pages, the contact page (beside the request a quote form) and the Business Bloomer Club sales page (just above the pricing table), so I thought it would have been great sharing the snippet with you. Enjoy!

Continue reading WooCommerce: Display Product Reviews @ Custom Page (Shortcode)

WooCommerce: Full Width Featured Image @ Single Product Page

The standard layout for the WooCommerce single product page features the main/featured product image on the left and the title/add to cart on the right. But what if you need to turn that image into a hero one i.e. a full width featured image, and push the title and add to cart button under it?

Well, for once, we’ll take a look at a CSS-only snippet. Sometimes the easiest things are also the ones that work brilliantly. Enjoy!

Continue reading WooCommerce: Full Width Featured Image @ Single Product Page